Advertisement

5 Tips For Relining Your Pipes For Maximum Effectiveness

Introduction

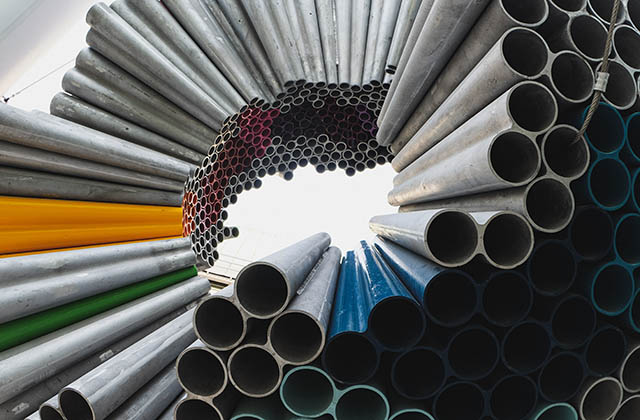
Pipes can be one of the most important features in your home, and fortunately, they are also among the most durable. However, over time, pipes can start to degrade and become less effective than they were when first installed. Luckily we have a Sydney pipe relining in our area that can help us fix any issues in our line. One reason for this is that pipes naturally have a lot of build-up inside them as they age. This buildup can cause blockages and lead to many other problems with your plumbing system. In order to avoid costly future repairs while enjoying maximum efficiency from your pipes now, consider relining them! Here are five tips on how you can do just that:

1. Keep Checking Your Pipes

When it comes to the effectiveness of your pipe relining, you have a lot of power. The first step to making sure that your pipes are working at their best is by checking them regularly. Take note of how long it takes for your water pressure to build up and make sure that there are no leaking sounds coming from anywhere on your property. Keep track of where all the pipes are located so that if there is trouble in any area, you can easily identify it without having to waste time searching through different areas.

2. Clean Your Pipes Regularly

You should clean the pipes in your home regularly. How often depends on how many people are in your home and what type of pipes you have. If you have a lot of parties or family gatherings, then you might want to clean every month. If not, then every two months is fine as well.

You should use a cleaning solution that’s appropriate for whatever material your pipes are made out of (plastic, rubber, galvanized steel). The best way to determine which type of pipe is in your basement is by looking at the screws holding it together—they will be either brass or black iron screws if they’re galvanized steel; other types use silver colored screw heads instead.

If you don’t know how much pressure there is going through your water system right now, ask someone who does! Then try using this information when determining which cleaning product would work best for you: if there isn’t enough pressure coming through these lines already then it makes sense not putting too much extra force into them since doing so could cause damage beyond repair costs–so make sure everything stays nice and relaxed before investing into any kind Of cleaning products too soon!

3. Test Your Water

  • Test your water.
  • If it’s bad, fix it.

If you have bad water quality, pipes will clog up faster and make the whole job more expensive in the long run. The easiest way to test your water is by taking a sample to a lab or getting an at-home kit from Amazon or Home Depot. If your results show that there are any contaminants in your water (which can include things like chlorine, copper, lead and so forth), then it may be worthwhile investing in services like reverse osmosis or otherwise upgrading your plumbing system if you want to protect the longevity of your relining job.

4. Avoid Harmful Chemicals

  • Avoid harmful chemicals.

There are a number of harsh chemicals that can damage the lining inside your pipes, so it’s best to avoid using these if at all possible. The following list includes some common plumbing products and their effects on your relining:

  • Bleach – bleaching is sometimes used with certain types of pipe cleaners, but this should be avoided when relining because it will corrode the lining material and cause breaks or leaks in the future. If you must clean with bleach, be sure to rinse off any residue completely before applying new insulation.
  • Drain Cleaner – drain cleaners are also toxic and may degrade or dissolve the lining material on your pipes if they come into contact with it while being used on drains. Be sure never to pour any kind of chemical down your kitchen sink unless you know for certain that it’s safe for use with plastic linings!

5. Get In The Habit

  • Get In The Habit

Daily maintenance is important for any type of piping, but it’s especially true for relined pipes. If you get into the habit of checking your relined pipes every day, you will be able to tell when something is wrong and fix it quickly before it becomes a much bigger problem. This is also important because it will save you money in the long run by preventing more costly repairs down the line.

By following these tips, you can maximize the effectiveness of your relined pipes and enjoy them for a long time to come, with minimal worry about future blockages or other issues.

Relining pipes is a great way to save money and protect the environment, as well as save time and enjoy your home for longer. It’s an affordable solution that can keep you from worrying about future blockages or other issues with your plumbing system. By following these tips, you can maximize the effectiveness of your relined pipes and enjoy them for a long time to come, with minimal worry about future blockages or other issues.

Conclusion

The best way to keep your relined pipes in good shape is to do the things listed above. By making sure that your pipes are regularly cleaned, tested for water quality, and kept free of harmful chemicals (i.e., bleach), you can avoid the need for emergency repairs and expensive plumbing bills down the road. Look in our website for pipe relining.

5 Helpful Tips to Find the Right Pilates Studio Near You

Introduction

Pilates is a great way to improve your flexibility, balance, and strength. It’s also a good way to manage chronic pain or help prevent injuries. But finding the right studio can be a challenge. I’ve been practicing for over ten years now, and I’ve seen my fair share of studios—the good, bad, and ugly. Here are five tips that will help you find the perfect place for you:

Read through the class descriptions

If you have a favorite type of class, such as yoga or barre, it’s best to look for studios that offer those types of classes. If you don’t know what kind of classes interest you, take some time to read through their descriptions and see if any stand out. You should also ask yourself if the studio offers a variety of classes that appeal to your interests and goals. For example, if you want to get stronger and more flexible but also enjoy having fun and laughing with friends in group settings, then Pilates probably isn’t the right choice for you. But if flexibility is important but so is having fun with others at the same time—maybe even laughing at yourself—then Pilates might be perfect! Pilates instructor course has a lot of module that you can learn from.

Review the qualifications of the instructors.

You should always check the qualifications of your instructor. It’s important to look for a background in fitness, anatomy and physiology, pilates or otherwise. If you can, ask for references from former students of your potential instructor and read about their experiences online.

You should also consider whether or not the studio has other instructors on staff who are certified by reputable organizations like ACE (American Council on Exercise) or NASM (National Academy of Sports Medicine). These certifications indicate that an individual has both an understanding of proper exercise techniques as well as experience using those techniques successfully with clients. Finally, if possible, try to find out how long they have been practicing Pilates! The more experience they have had helping their clients achieve results means that they will most likely be able to help YOU achieve results too!

Make sure the studio has all the equipment you need.

If you’re new to Pilates and not sure what equipment is needed, look for a studio that has mats, balls, and straps. These are the bare minimums for a good Pilates workout.

If you’ve already taken a few classes at another studio and know which equipment you prefer (like springs instead of bands), let your new instructor know in advance so they can be sure to have it ready for class.

Pay attention to your body.

For example, if you’re in pain during a Pilates session, stop immediately. Pain is your body’s way of telling you that something isn’t right. If it hurts to lift your leg or bend forward, don’t do it! Conversely, if the exercises are easy for you, keep going until they become challenging. It takes time to get acclimated to any activity and it can be frustrating when a new exercise doesn’t seem difficult enough at first glance—but just because something feels easy now doesn’t mean that it won’t feel challenging later on.

Always listen carefully to your body and never push yourself past what feels right for you—you’ll only end up getting injured or burning out in the long run!

Remember: The goal of Pilates isn’t necessarily how much weight we can use but rather how many repetitions of an exercise we can complete before our muscles fatigue (which is why most instructors will tell students not to count their reps). Your instructor should assess whether this number decreases over time; if so then they know they’ve done their job well!

Follow your gut.

With so many studios to choose from, you may be feeling overwhelmed. To help narrow down your options, here are a few questions to consider:

  • Is the studio clean?
  • Does it have a good vibe?
  • Are other people in the studio friendly and welcoming?

If the answer is yes, then this might be the right place for you!

Take the time to make sure a studio is a good fit for you before committing

The best way to find a Pilates studio that’s right for you is by taking the time to make sure it’s a good fit for you before committing. Ask yourself if the studio is a good fit for you:

  • Does the instructor understand your goals?
  • Are they experienced in teaching people with similar body types and conditions as yours?
  • Do they have any special certifications related to these things?

If so, then this might be a great place to check out!

Conclusion

We hope these tips have helped you find the right Pilates studio near you. Remember to take your time when choosing a Pilate’s studio and make sure every aspect of it is a good fit for you. This means not only looking at the class descriptions but also reviewing the qualifications of instructors and making sure they have all equipment needed for your sessions. Contact us on how to get enroll with Pilates courses.

How To Make Money With Lawn Signs & Yard Signs

Introduction

Lawn signs and yard signs are an excellent way to promote your business. Unfortunately, they can be pricey, but in this article I’ll show you how to make money with these yard signs. Here are the steps:

Step 1: Create An Account

  • Go to the sign.com website, click on “Signup Now” and fill in your information
  • Your account will be created automatically when you register
  • Log into your account by clicking “Login” at the top right of any page on sign.com
  • You’ll see a link at the top of your home page to verify your account with PayPal or Stripe

Step 2: Purchase Lawn Signs

Once you have a lawn sign in hand, it’s time to put it up. This is the fun part—and also the potentially frustrating one. Once you’ve decided where you want your sign, whether that’s hanging on a tree branch or staked into the ground at an angle, take the following steps:

  • Place your order for lawn and yard signs (see Step 1).
  • Purchase rope or twine to hang your signs from trees or stakes (or both). You’ll want this material long enough to cover any height and depth requirements of your signage.
  • Buy stakes if you don’t already own some. If there aren’t stakes available at home-improvement stores like Lowe’s or Home Depot, try local hardware stores like Ace Hardware instead; they may carry more variety than big-box retailers do.

Step 3: Promote Your Lawn Signs

Social media is a great way to promote your lawn signs.

Post a selfie on Facebook with the sign in the background, use Instagram hashtags like #yardsigns and #lawnsigns, and make sure you’re sharing content that’s relevant to your audience.

Use other social media platforms such as Twitter or Snapchat if they fit better into your marketing strategy. You can also create an ad on Facebook or Google to boost posts about lawn signs in specific areas where people are likely to be interested in buying them from you (this works particularly well for big cities).

Step 4: Get Paid!

  • Make sure you have a valid email address.
  • Make sure you have a valid mailing address.
  • Make sure you have a valid phone number.
  • Make sure you have a valid credit card or PayPal account, or Venmo account if that’s your thing (it isn’t mine).

Now that we’ve got all of that out of the way, it’s time for our final step: getting paid!

Find out how to make money with lawn signs and yard signs by clicking here.

Find out how to make money with lawn signs and yard signs by clicking here.

You can make money with lawn signs and yard signs by signing up for the Lawn Sign Wizard service, which is a one-time payment of $97. Once you’ve paid, you will get access to a few different templates that you can use to create your own custom designs. There are also detailed instructions on how to use them as well as a list of terms and conditions for using their service. The best part about this system is that it’s very easy for anyone who wants to start making money from their yard or front lawns! Signwriters Sydney has worked experience with lawn signages.

Conclusion

If you’re looking for an easy way to make money and get your name out there, lawn signs are the way to go. They don’t require much work on your part and they can be placed in front of your house where everyone will see them.